Submission System Guide
The PEG Data Registry is available at kpndataregistry.org/peg.
Before You Begin
Before starting your submission, prepare the three required files and ensure your study meets the following requirements:
Study scope
- One PEG study covers one trait and one GWAS source.
- If your study spans multiple traits or GWAS sources, please split into separate submissions.
Submission files — see individual preparation guides for details:
- PEG Evidence Matrix (TSV) — all genes at each locus, all evidence values included without filtering
- PEG Metadata (XLSX) — completed using the submission template
- PEG List (TSV) — one top-priority gene per locus, single integration conclusion per row
Step 1: Create an Account
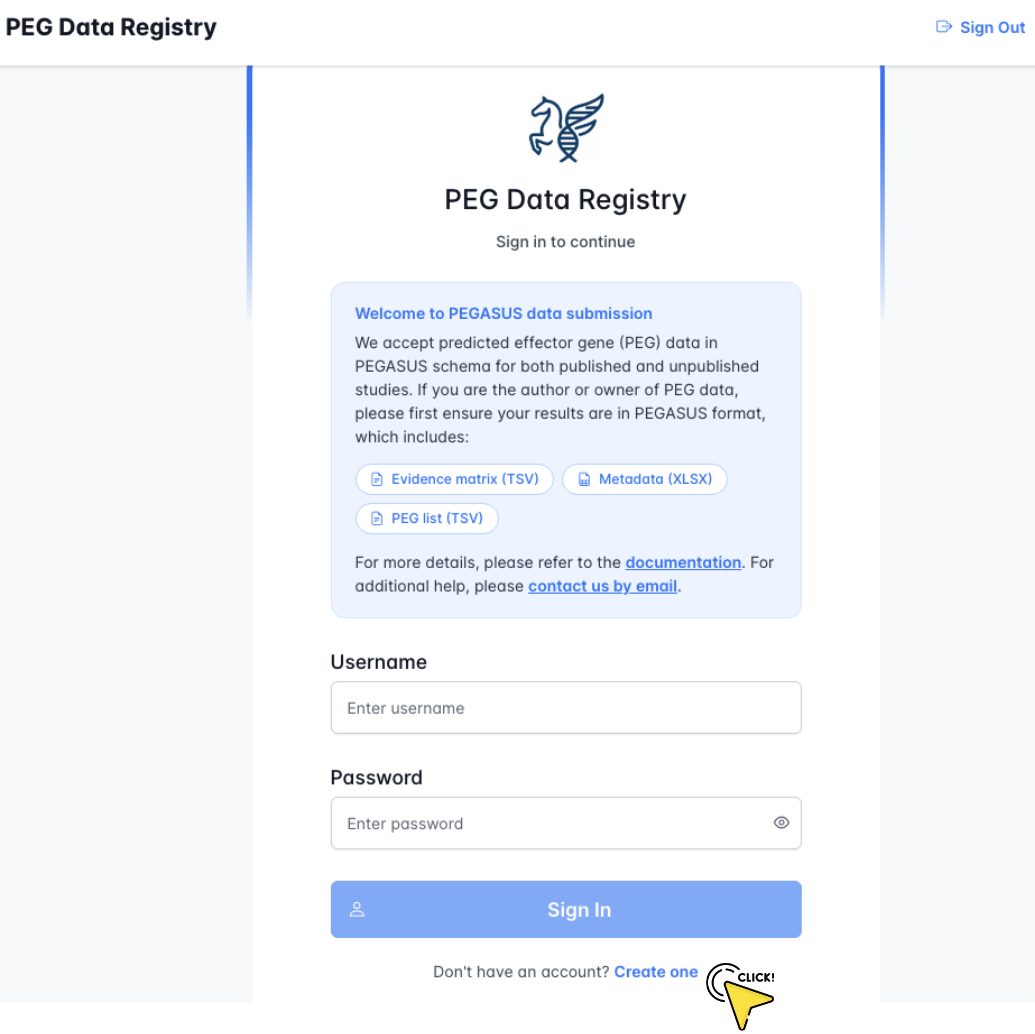
Go to the PEG Data Registry.
- The welcome panel summarises the files you need before submitting.
- If you already have an account, enter your credentials and click Sign In.
- If you are new, click Create one at the bottom to register.

On the Create a PEG account page:
- Enter your email address.
- Choose a password and confirm it.
- Click Create account.
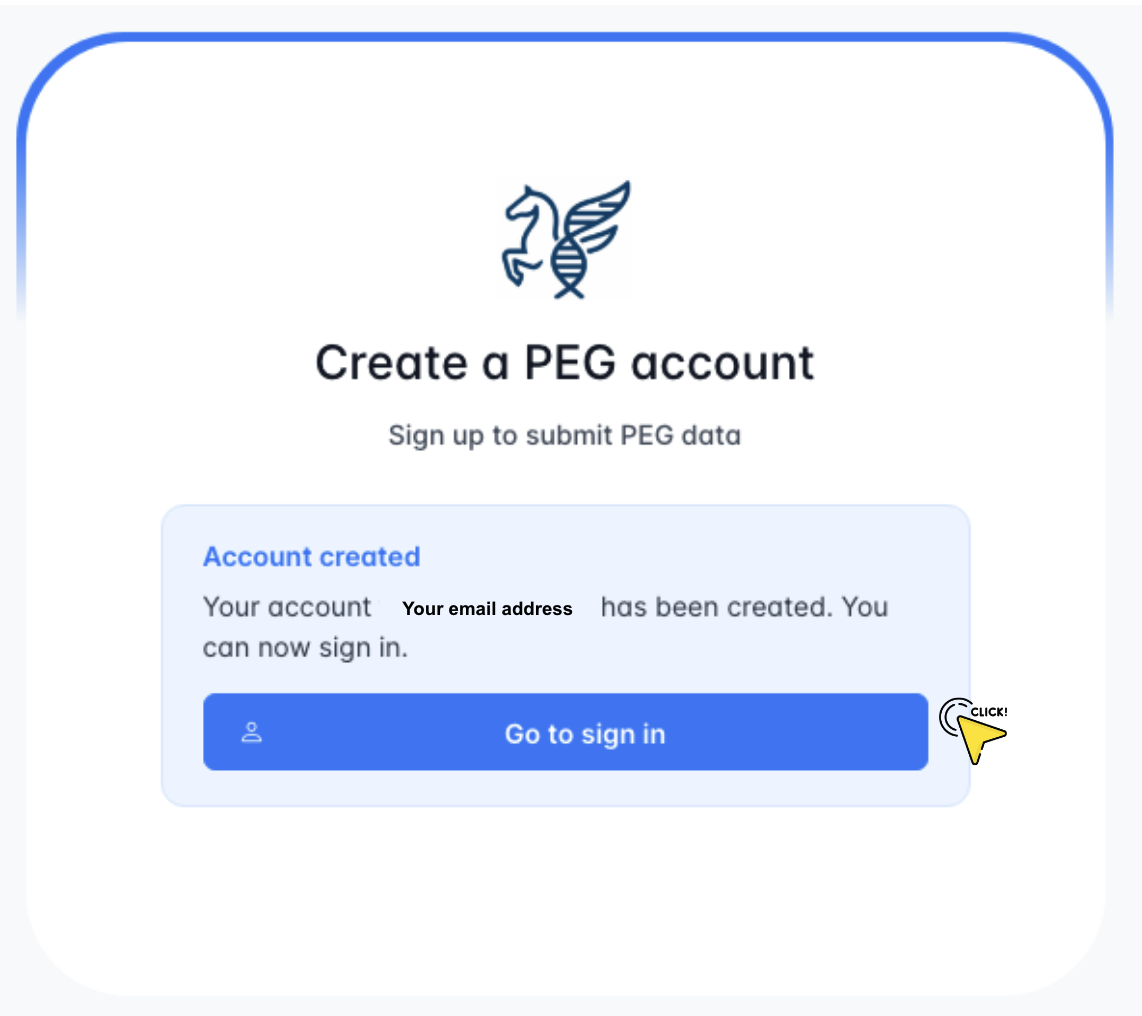
- A confirmation message will appear showing your registered email address.
- Click Go to sign in to proceed to the login page.
Step 2: Sign In
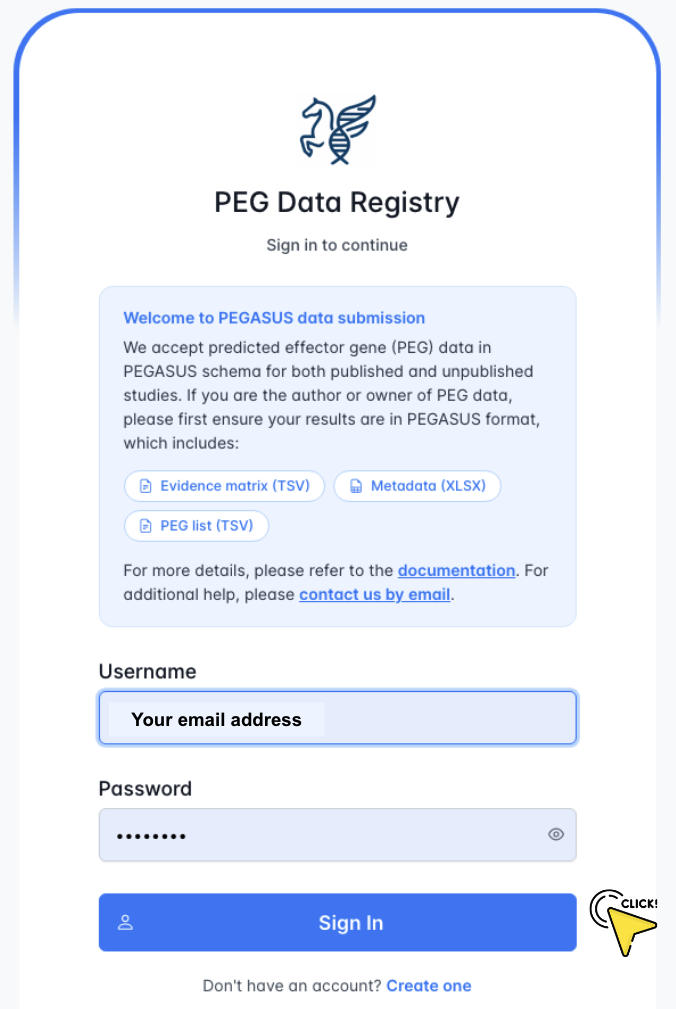
- Enter your email and password.
- Click Sign In.
Step 3: Start a New Study
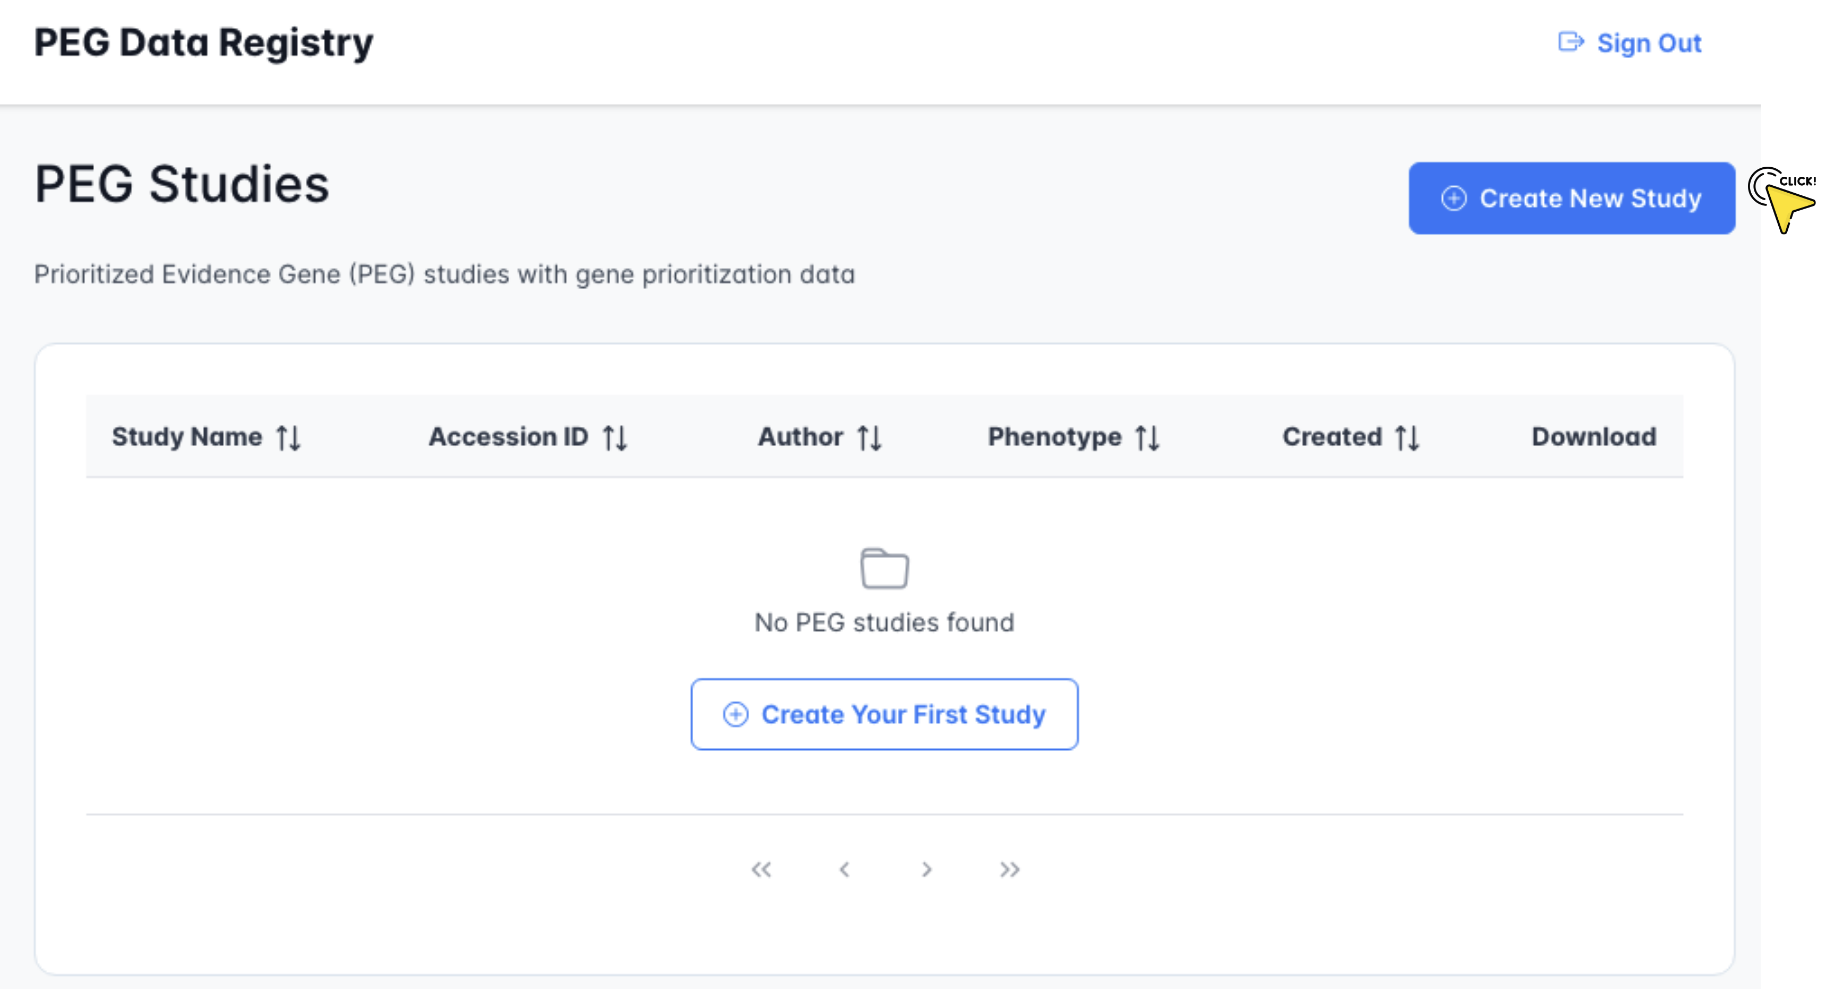
The PEG Studies dashboard lists all your submissions.
- Click Create New Study in the top-right corner.
- Alternatively, click Create Your First Study if this is your first submission.
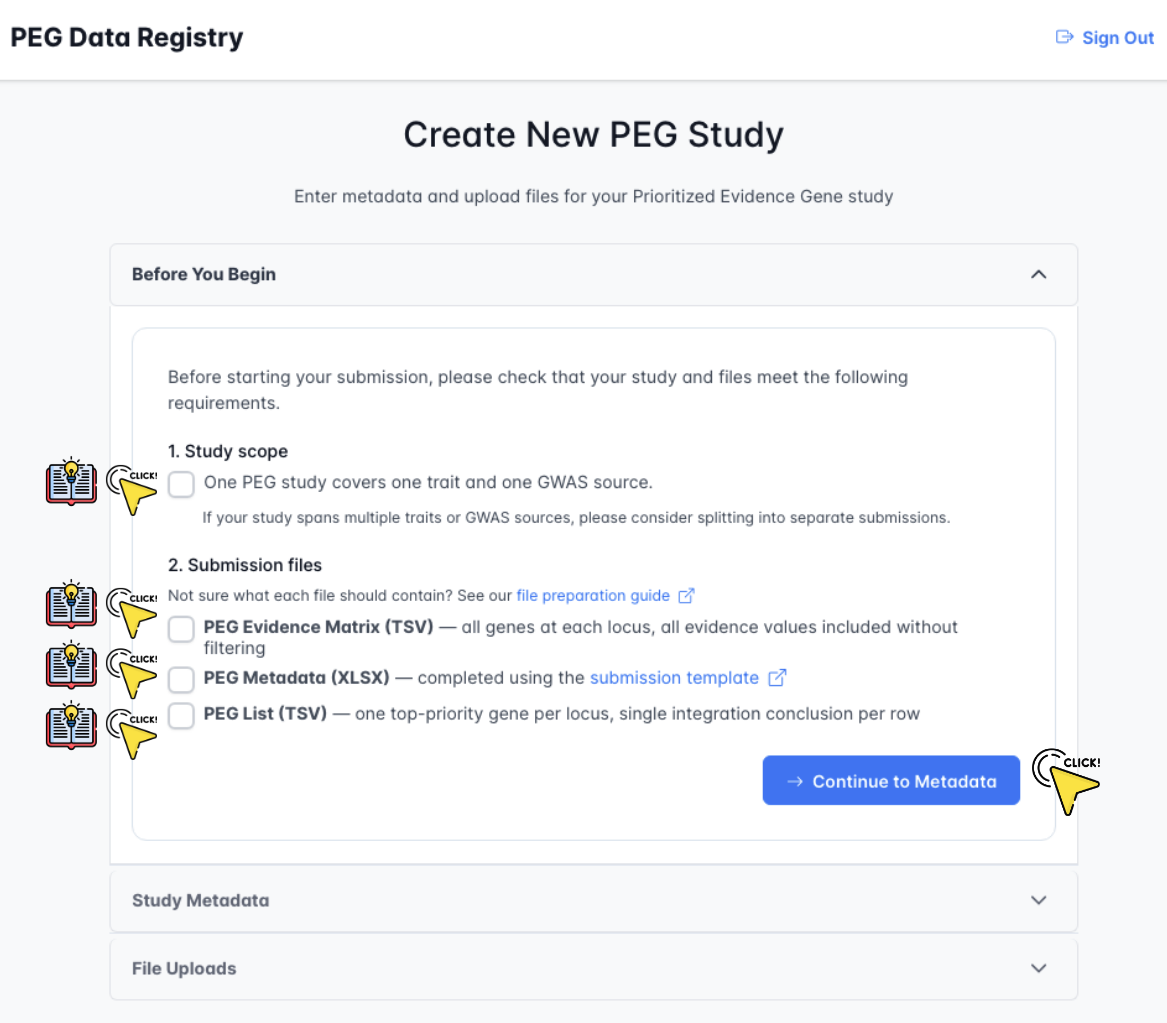
Review the Before You Begin checklist.
- Confirm your study covers one trait and one GWAS source.
- Confirm you have all three files ready. If you are unsure about the expected format or content of each file, see the file preparation guides.
- Click Continue to Metadata when ready.
Step 4: Enter Study Metadata
Study Information & Phenotype
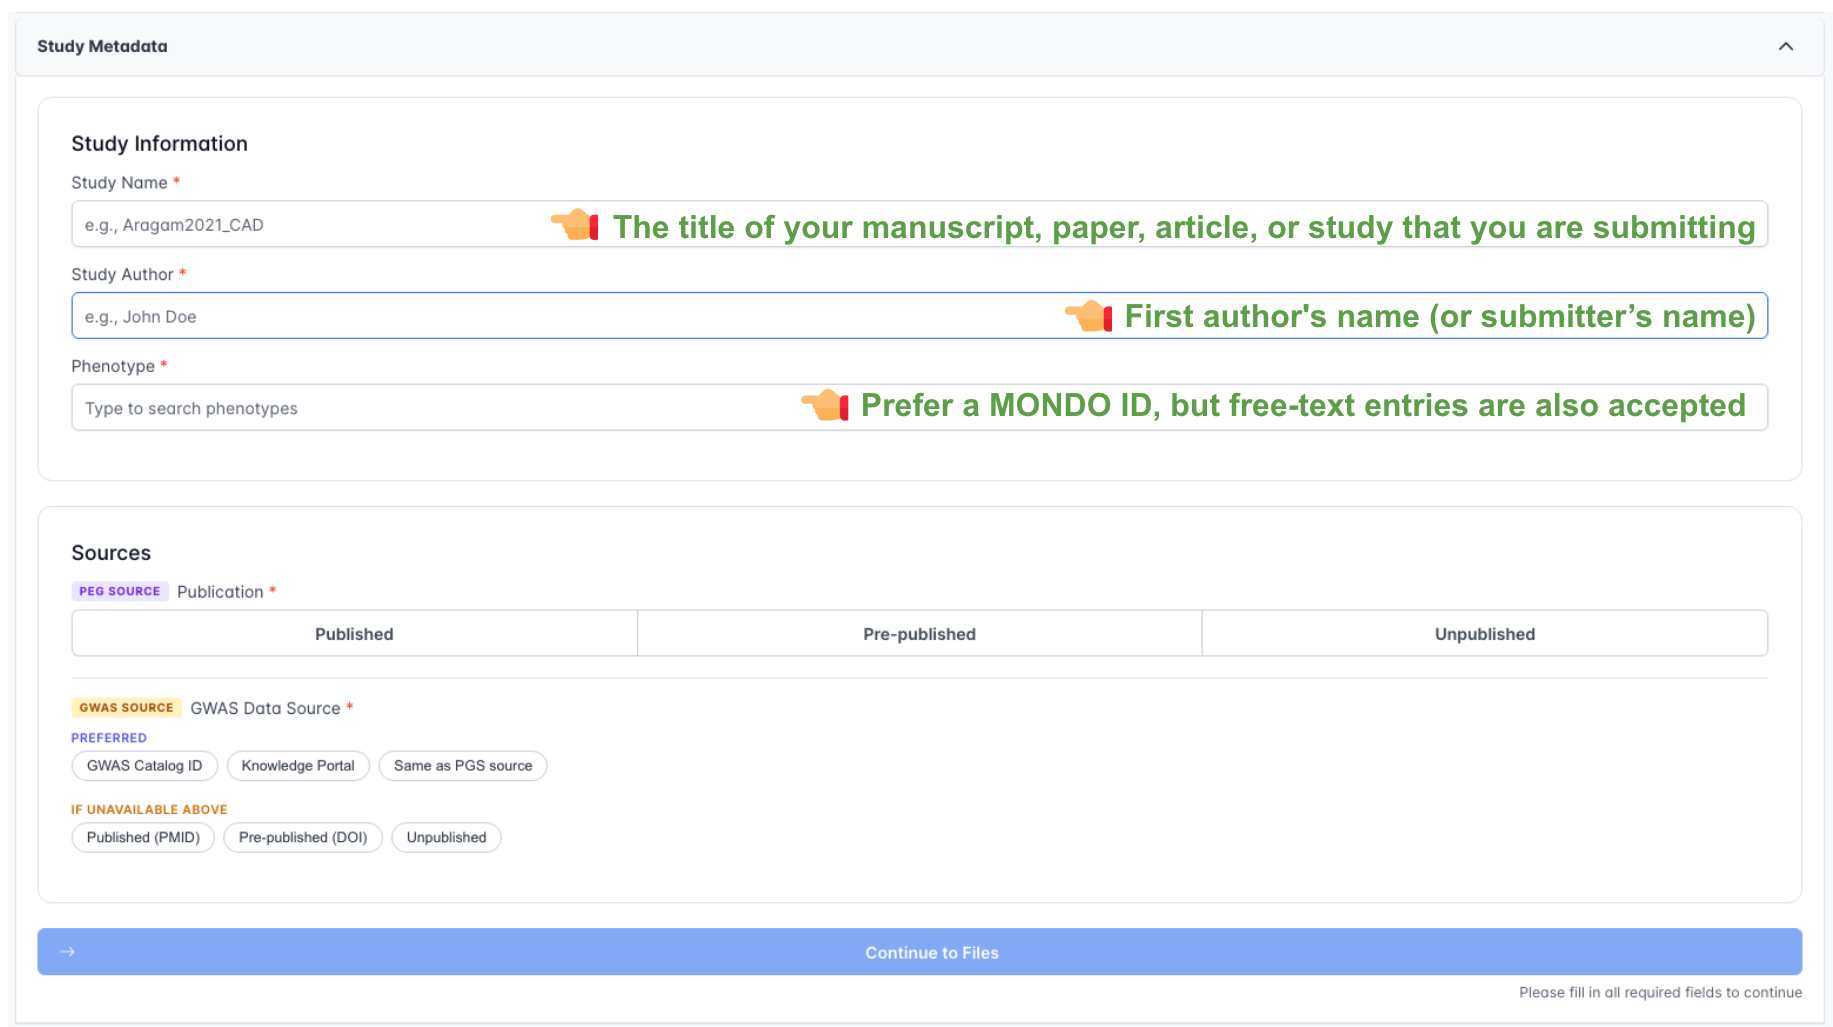
- Study Name — the title of your manuscript, paper, or study (e.g.,
Aragam2021_CAD). - Study Author — the first author's name or the submitter's name.
- Phenotype — a MONDO ID is preferred; free-text is also accepted (see below).
- Select the PEG Source publication status (Published / Pre-published / Unpublished).
- Select the GWAS Source from the available options.
Phenotype Input

The phenotype field supports two input modes:
- MONDO ID (preferred) — type a MONDO identifier (e.g.,
MONDO:0005267). Using a standardised ontology term enables your data to be linked with ClinGen and other clinical resources. - Free-text search — type a trait name and select a term from the dropdown list. A free-text entry is also accepted if no suitable term is available.
PEG Source
The PEG source is the primary source — the publication or manuscript that reports your PEG data.
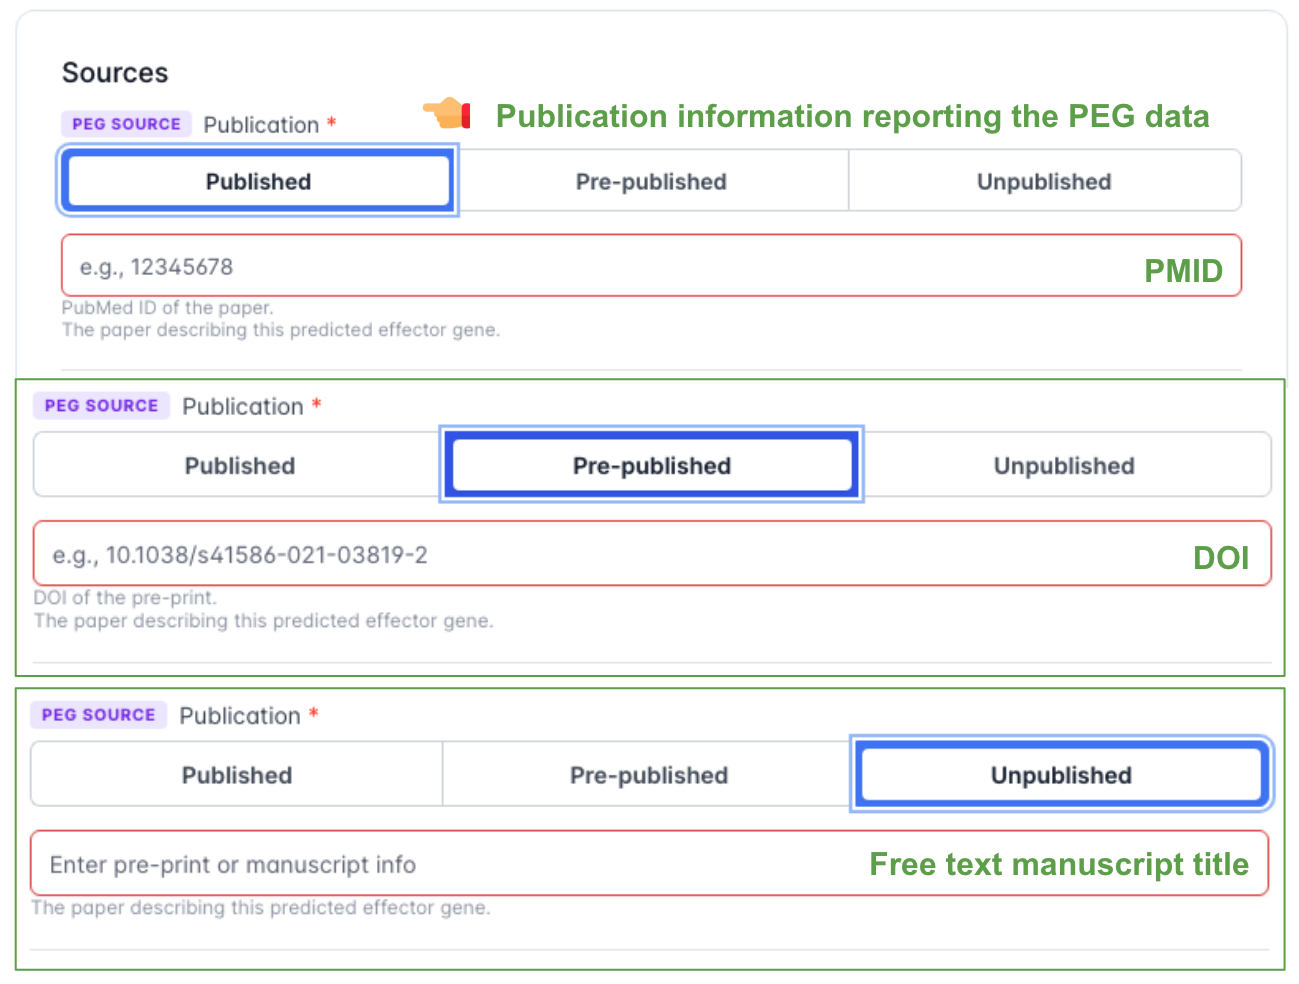
Select the publication status and provide the corresponding identifier:
- Published — enter the PubMed ID (PMID) of the published paper.
- Pre-published — enter the DOI of the pre-print.
- Unpublished — enter a manuscript title or brief description.
GWAS Source
The GWAS source is the GWAS dataset that drove your PEG analysis. Use the highest-priority option that applies.
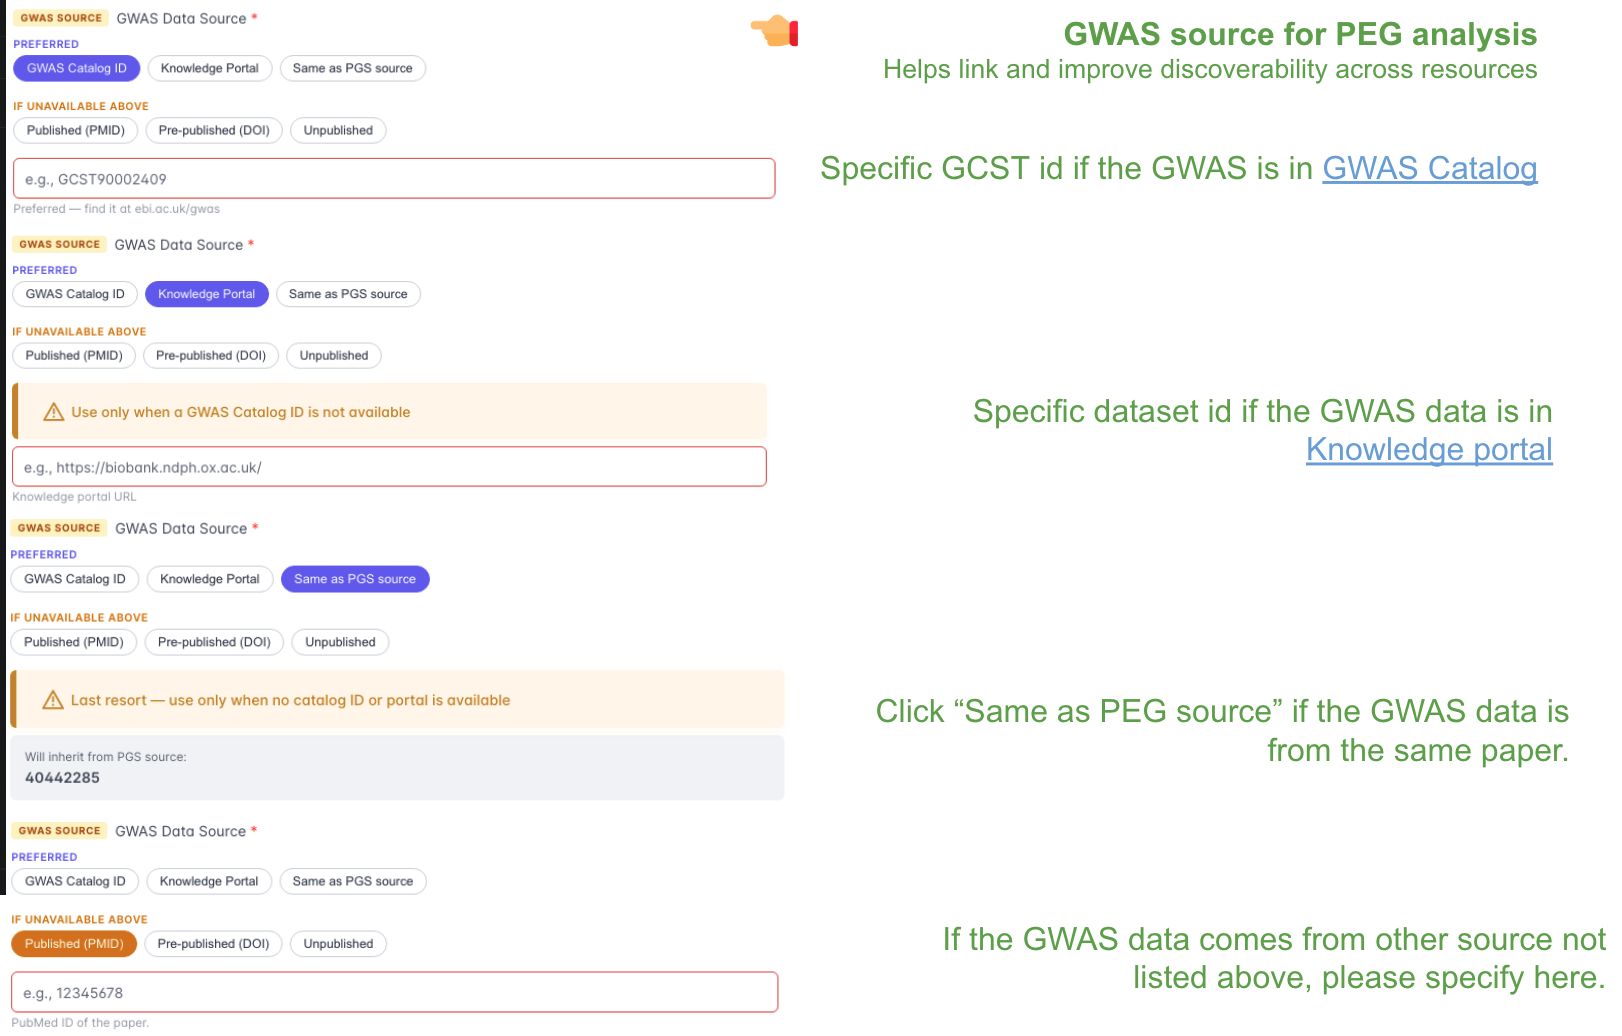
Preferred (use the first that applies):
- GWAS Catalog ID — enter the
GCSTaccession (e.g.,GCST90010729), available at ebi.ac.uk/gwas. This is the preferred option as it enables cross-resource discoverability. - Knowledge Portal — enter the dataset ID if the GWAS data is hosted in the Knowledge Portal.
- Same as PEG source — select this if the GWAS summary statistics are from the same publication as the PEG data.
If none of the above are available:
- Published (PMID) — enter the PubMed ID of the paper containing the GWAS data.
- Pre-published (DOI) — enter the DOI of the pre-print.
- Unpublished — enter a brief description of the GWAS data source.
Step 5: Upload Files
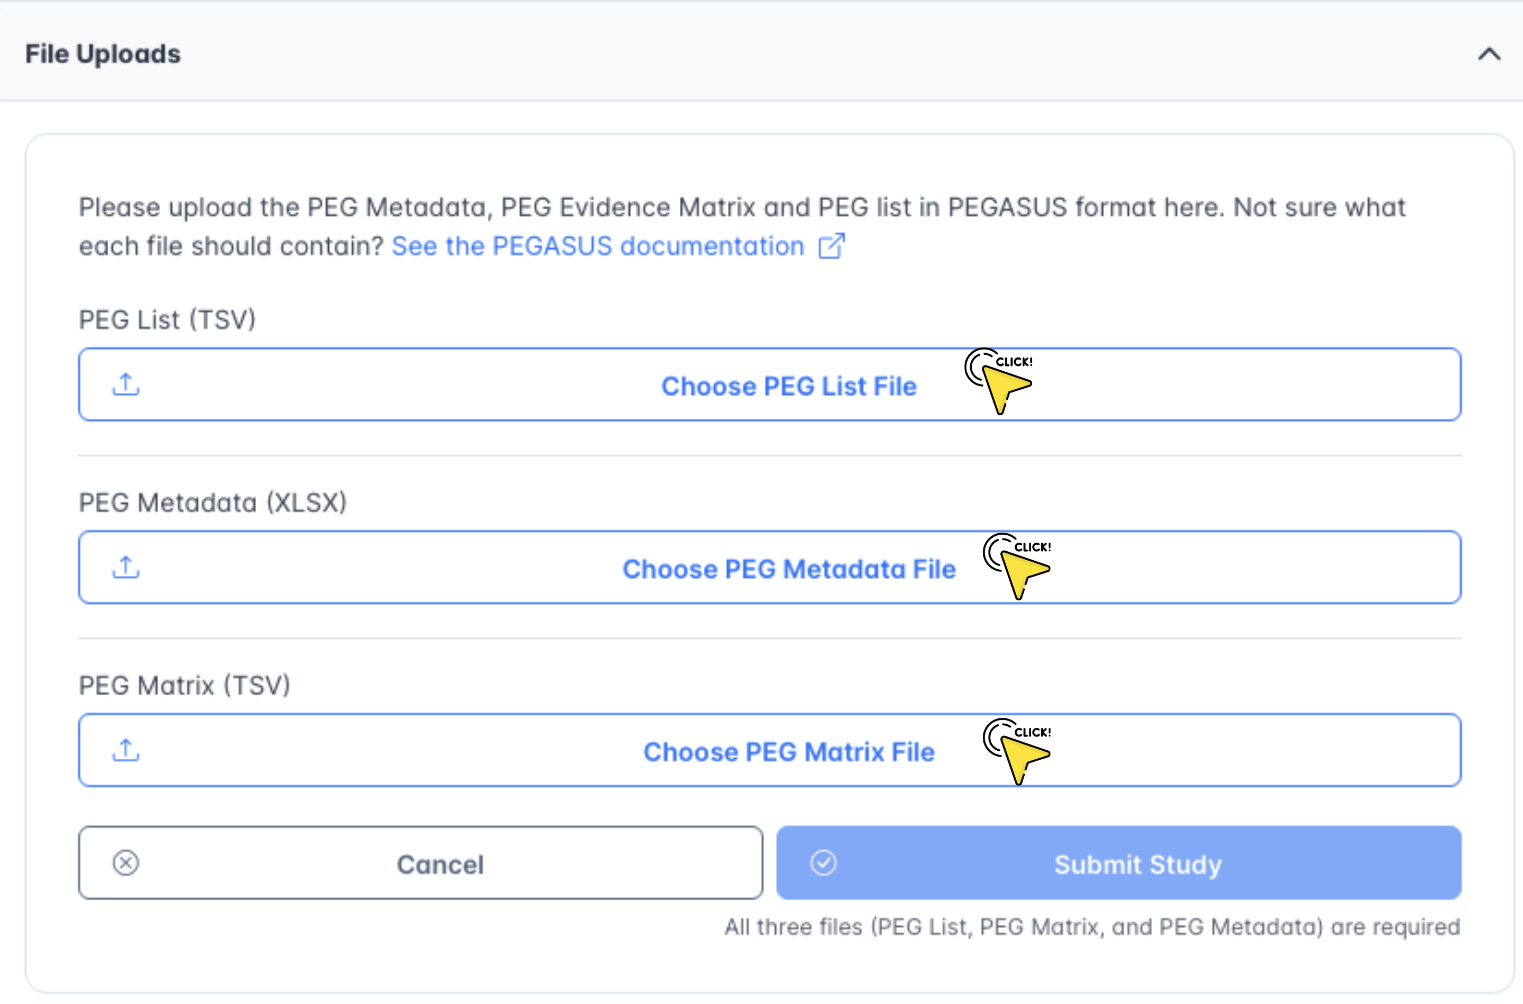
Upload all three required files in PEGASUS format:
- Click Choose PEG List File and select your TSV file.
- Click Choose PEG Metadata File and select your XLSX file.
- Click Choose PEG Matrix File and select your TSV file.
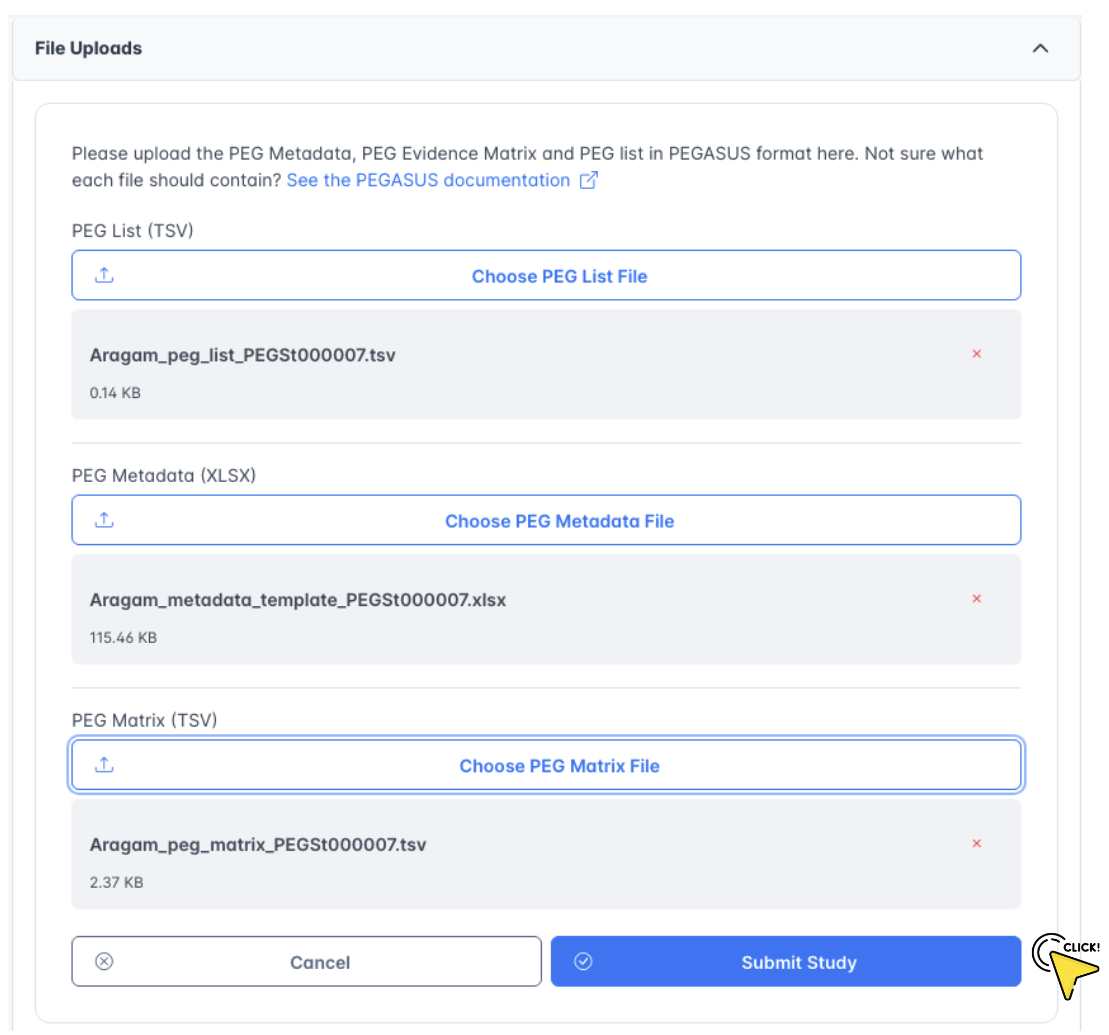
- Once all files are selected, their names and sizes will appear below each upload button.
- Click Submit Study to complete the submission.
Step 6: View Your Submission
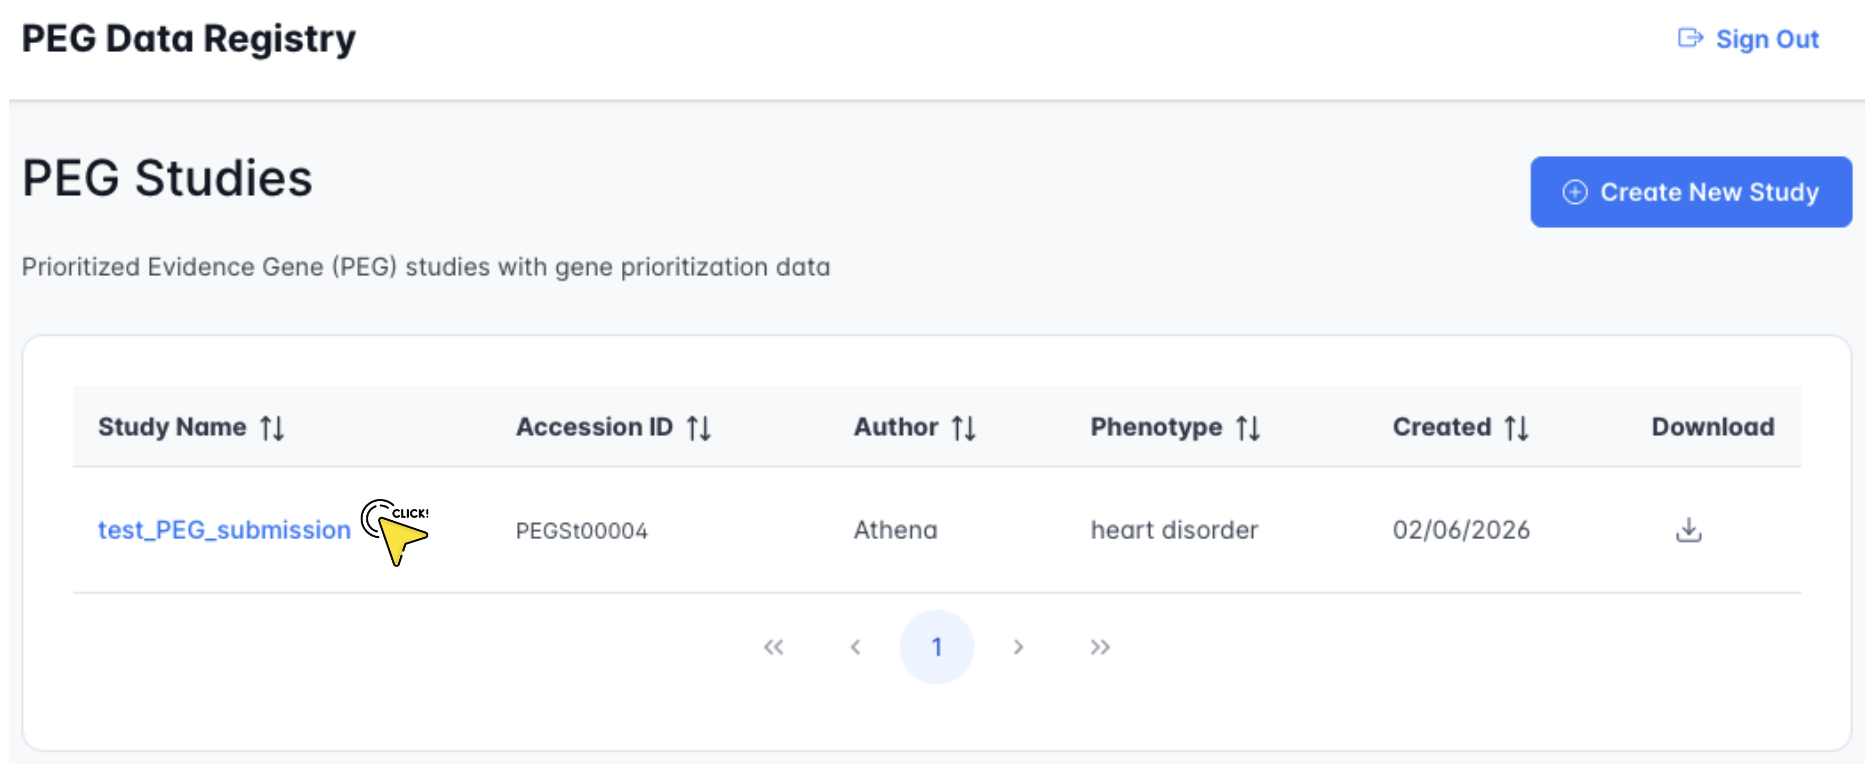
- After submission, your study appears in the PEG Studies dashboard with a unique accession ID (e.g.,
PEGSt00004). - The table shows the Study Name, Accession ID, Author, Phenotype, and creation date.
- Click the study name to view the full submission details.
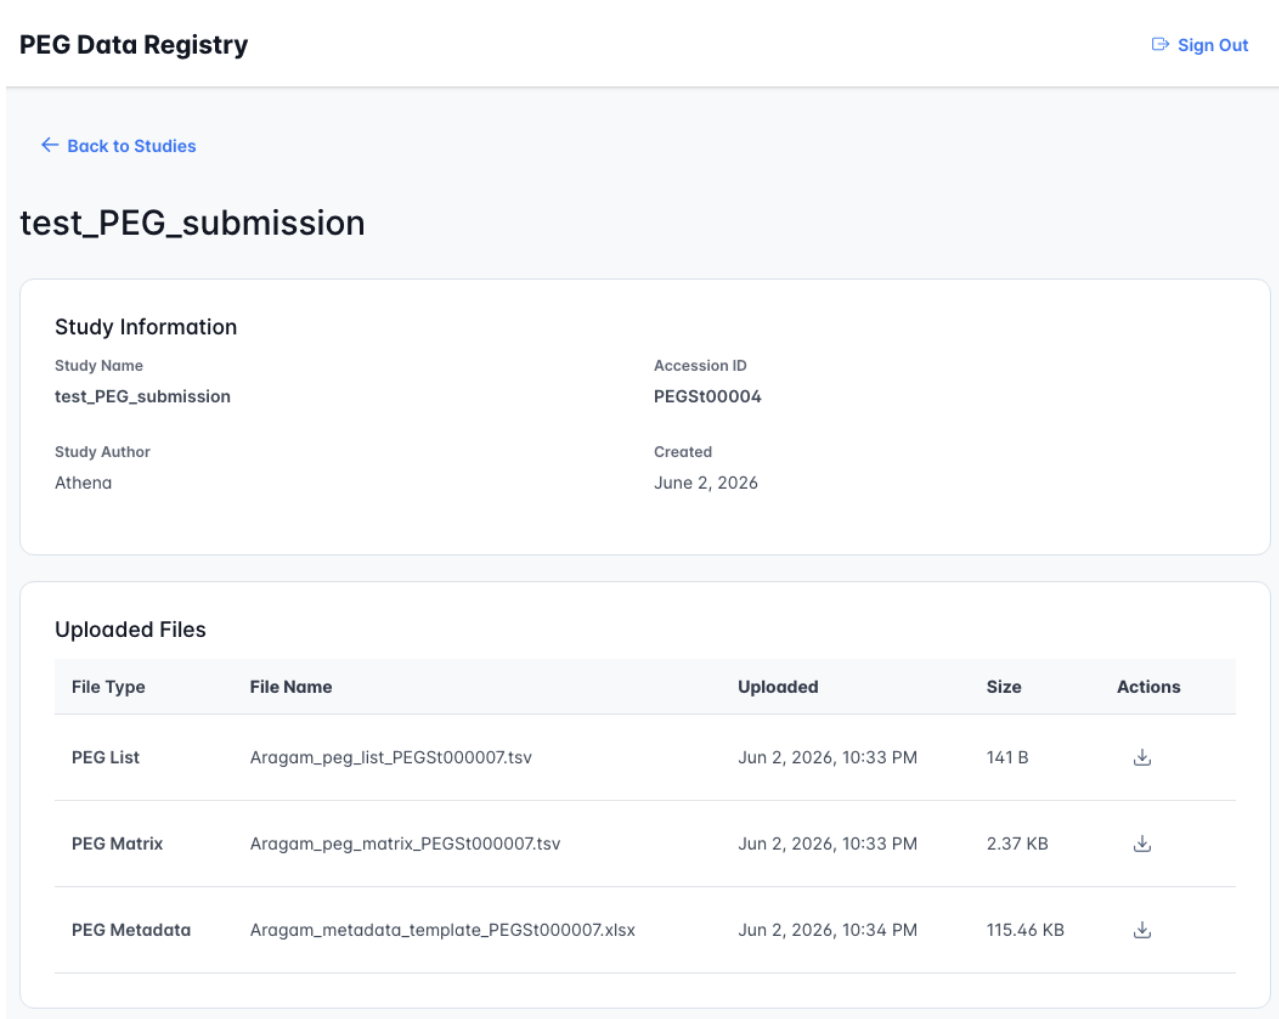
- The Study Information panel shows the study name, accession ID, author, and submission date.
- The Uploaded Files table lists each file with its name, upload timestamp, and size.
- Click the download icon next to any file to retrieve it.